This is a great little tutorial from 2011 running adobe photoshop CS6. I love keeping this dated stuff around. Times have changed and the facade has moved along but the math remains the same. The tutorial holds up to the standards of today. Toning With Duotones, Tritones, and Quadtones. This tutorial will teach you how to create duotones, tritones, and quadtones inside Photoshop.
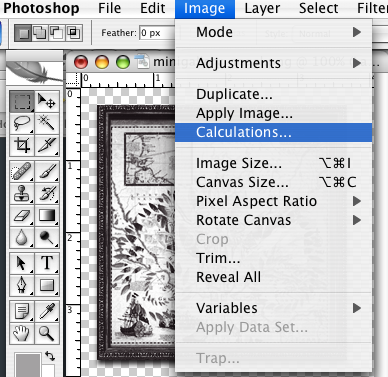
At the end of the photoshop tutorial, you’ll find a link to 5 custom duotone/tritones as a complimentary download. These colors are based upon Pantone Fall fashion report 2011. Your photograph must first be converted to black and white. One of my favorite methods to convert to BW is using ‘calculations’. Open your photograph and click on the image, then calculations.
The calculations dialogue box opens. There are four areas to focus on in the ‘calculations’ dialogue box. The two channels, the blending mode, and opacity settings. I usually combine the ‘red’ and ‘green’ channels. The ‘soft light’ blending mode is great for evenly toned BW. The ‘screen’ blending mode is good for high-key BW. You will need to alter the opacity setting to suit your photograph. Anywhere between 20-100%.
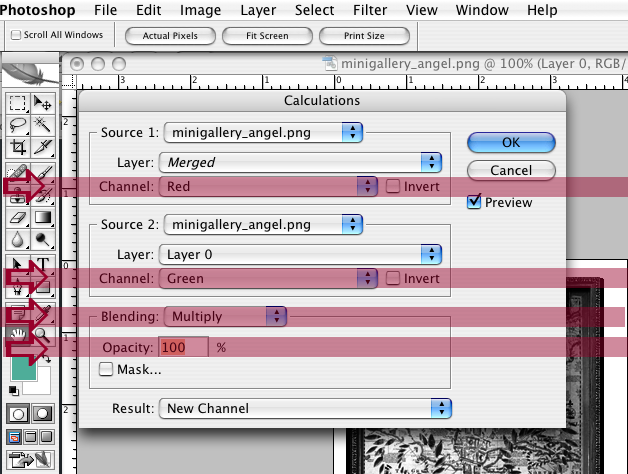
When you have the settings the way you want them, click ‘OK’. There are two further steps required to create your grayscale image. After you click ‘Image-Mode-Grayscale,’ a dialogue box will open up, asking if you want to discard color information. Click ‘Ok.’
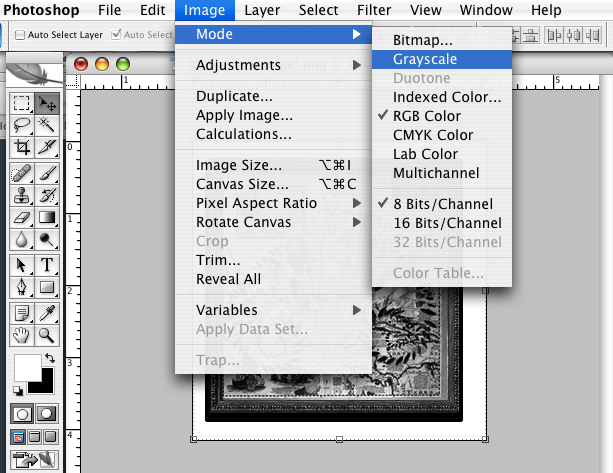
After clicking on Image-Mode-Duotone, the ‘Duotone’ dialogue box will open.

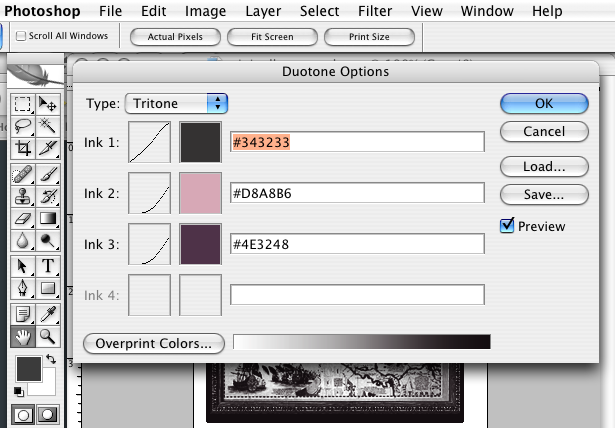
The drop-down box at the top left allows you to specify how many colors you will use to tone your image. There are three choices; duotone, tritone, or quadtone. Two of the great advantages of duotones are the ability to ‘load’ existing presets, as well as create your own. There are 5 of my custom duotone/tritones available as a complimentary download. Loading duotone pre-sets is simple. Click ‘load’ in the duotone dialogue box. If you have never used duotones before, Load your custom duotone/tritones into Adobe Photoshop/Presets/Duotones folder. To create & save your own custom duotones, click on one or more colors in the duotone dialogue box.
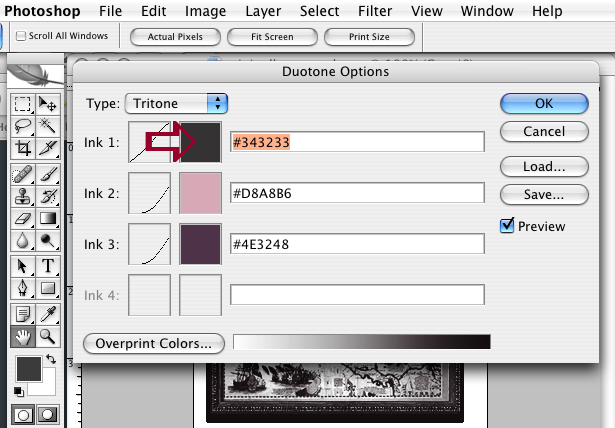
Either the ‘color picker’ or ‘pantone’ color boxes will appear. Choose the color you want and click ‘Ok.’
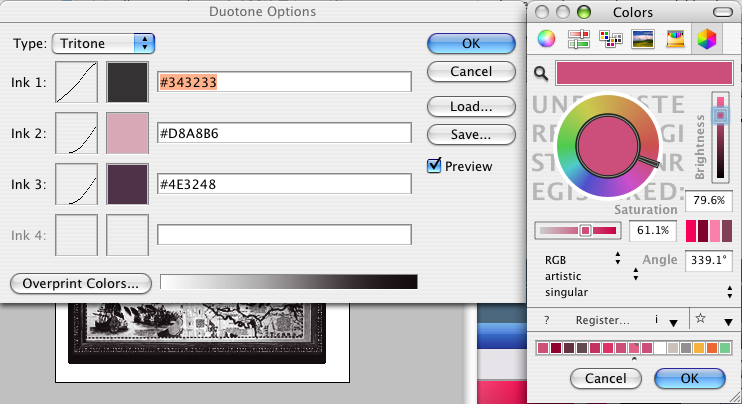
You can continue this process to change more colors. You can also change the spread of any particular color by clicking in the ‘curve’ area. By playing around with the curve you will control the spread of color.
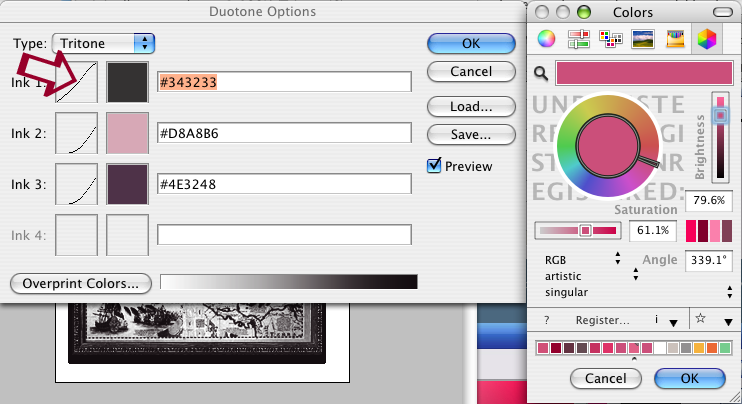
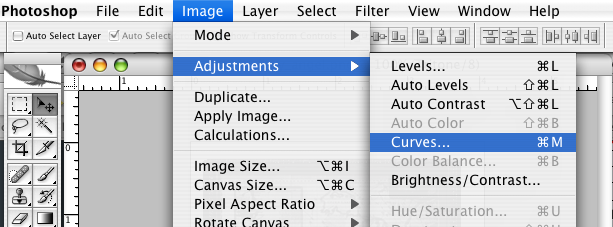
When finished in the ‘duotone curve’ box, click ‘Ok’. Then click ‘save’ in the duotone box to save your custom duotone into your own pre-sets folder. I finish up my Duotone/Tritone by adding a ‘Curves’ adjustment layer.
When finished in the ‘duotone curve’ box, click ‘Ok’. Then click ‘save’ in the duotone box to save your custom duotone into your own pre-sets folder. I finish up my Duotone/Tritone by adding a ‘Curves’ adjustment layer.
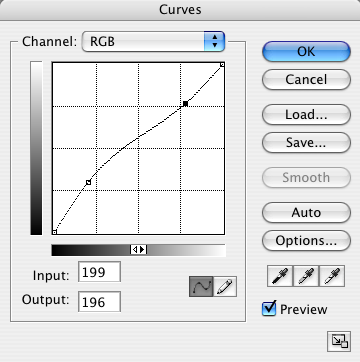
In order to save your file as a JPG, you will need to convert back to RGB color. that’s it, all done.
a download of my duotones can be found in my link section to the left.
Check out my graphic design blog archives here
Check out my graphic design portfolio here

